Last Minute Christmas Knitting: House Moccasins
So think of the worst knitting scenario possible…it’s a week from Christmas…and you remember that you really haven’t gotten done with the sweaters or cowls or whatever were supposed to go under the tree. Oh yeah….the nightmare is real…like now.
Enter to your rescue…THE HOUSE MOCCASINS. These puppies knit up REALLY fast using bulky yarn (my yarn was 100 yds per 100 grams) and people love them!
Image by Virginia Barrows
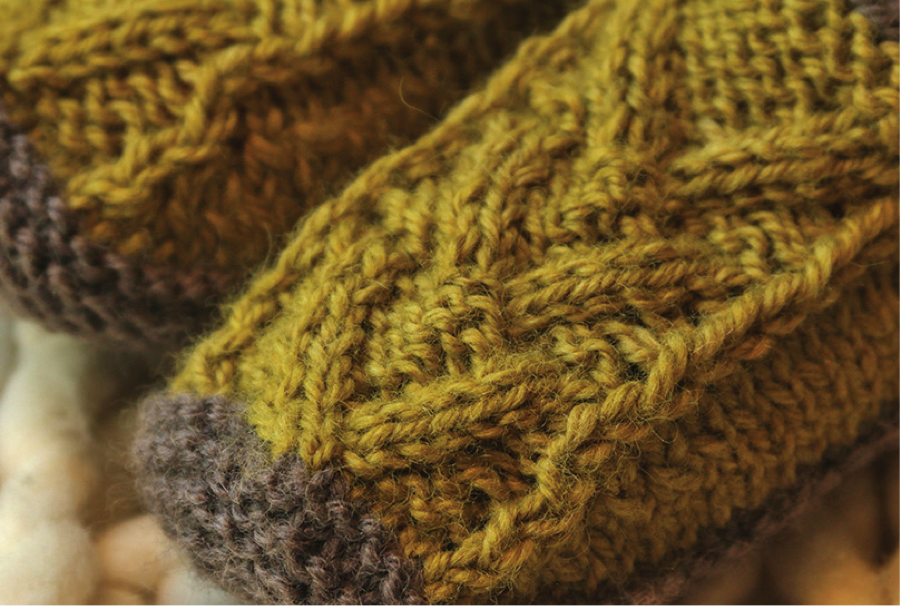
Image by Virginia Barrows
This pattern began with Yuko Nakamuro’s popular free pattern on Ravelry, Non-Felted Slippers, which was written for one size only. The staff (myself included) at Northcoast Knittery made some improvements on that pattern, adding a cable design to the top of the slipper, adding attached I-cord around the opening, and working up three sizes. Now that the Northcoast Knittery closed with the passing of our dear friend and owner of the shop last March, I decided to release the pattern with yet one more change, adding some additional shorts rows to the two larger sizes so the the upper edge of the moccasin top was built up a bit more . You need a 16” circular needle, Size 8, making the fabric dense so the slipper will wear well. These slippers are knit back and forth and then seamed along the middle of the foot and up the back of the heel. The top is shaped with some radical decreasing, and short rows are worked back and forth across the cabled top. Seriously folks, you can easily make a slipper in one evening.
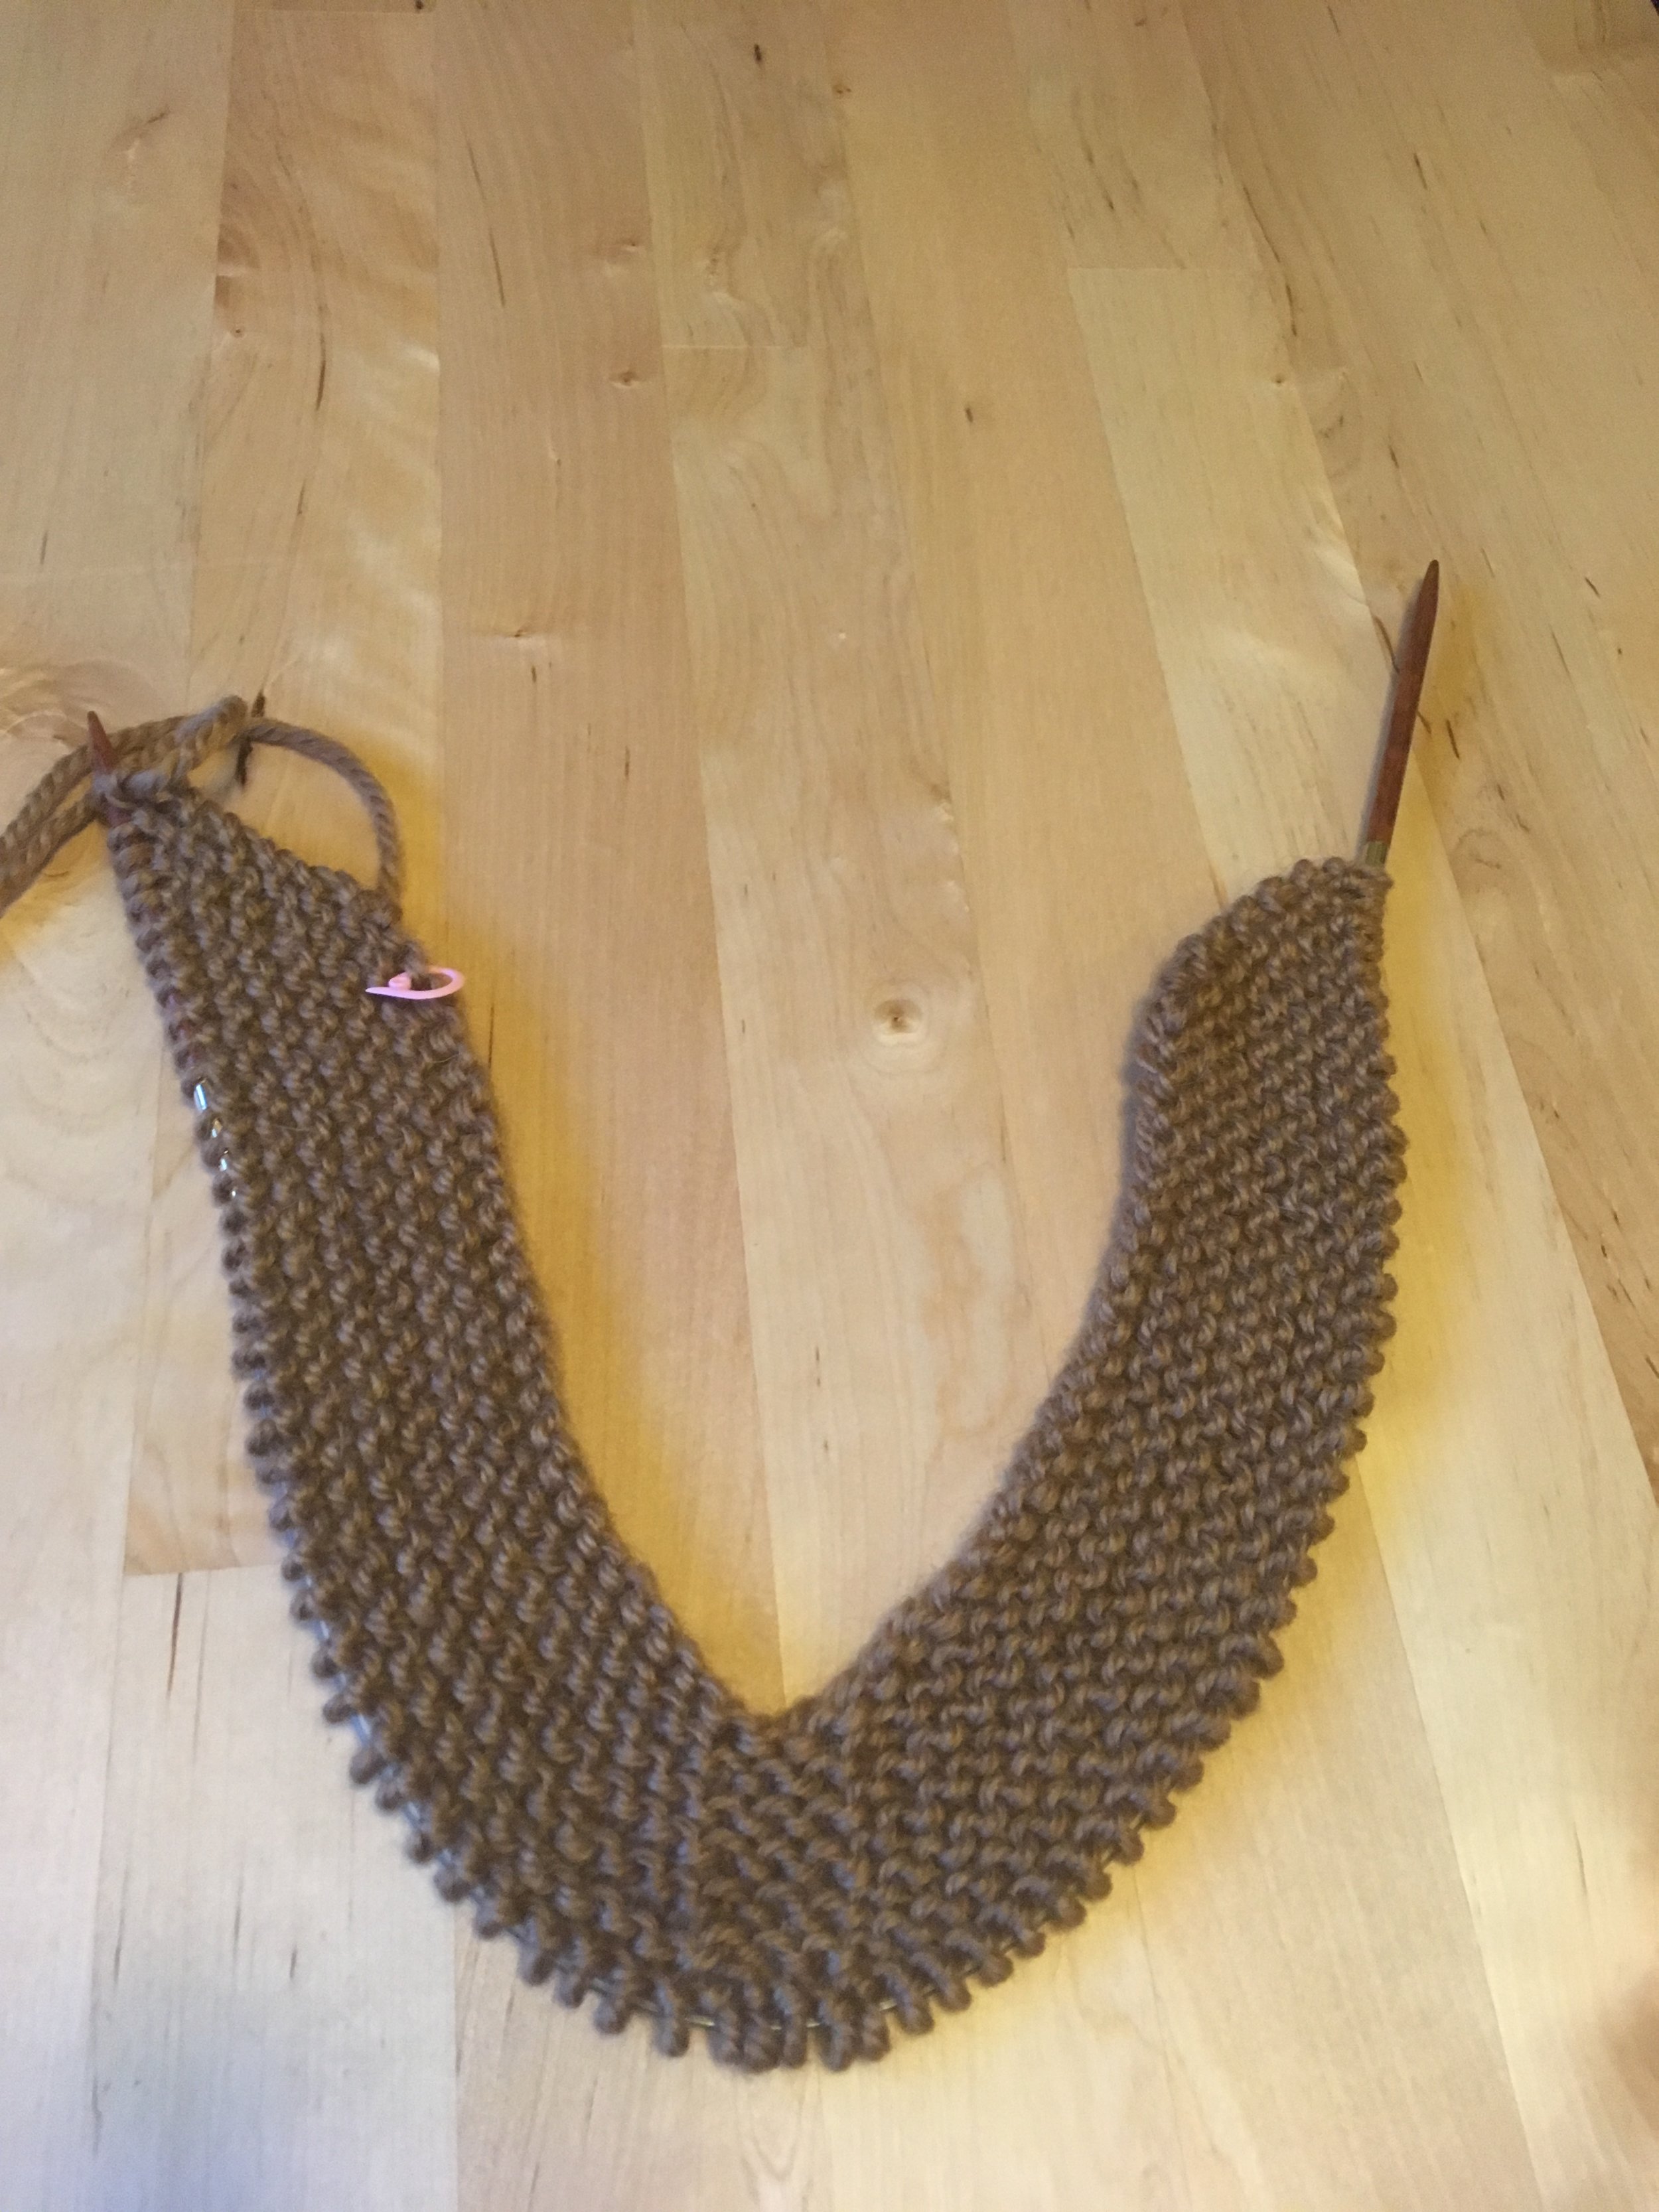
The knitting of the sole is complete. That center part will be sewn together to make the sole and the two top slants in this image will be the heel. The main yarn of the body, here yellow, is about to be joined.

Okay…jumped ahead a bit, but you can see how the yellow was added and a a few rows of radical decreases shaped the toes and also in those rows the first cable repeat was begun. In image, the short rows and decreases along each side of cable pattern has shaped the moccasin, and one is ready to now work the attached I-cord edge.
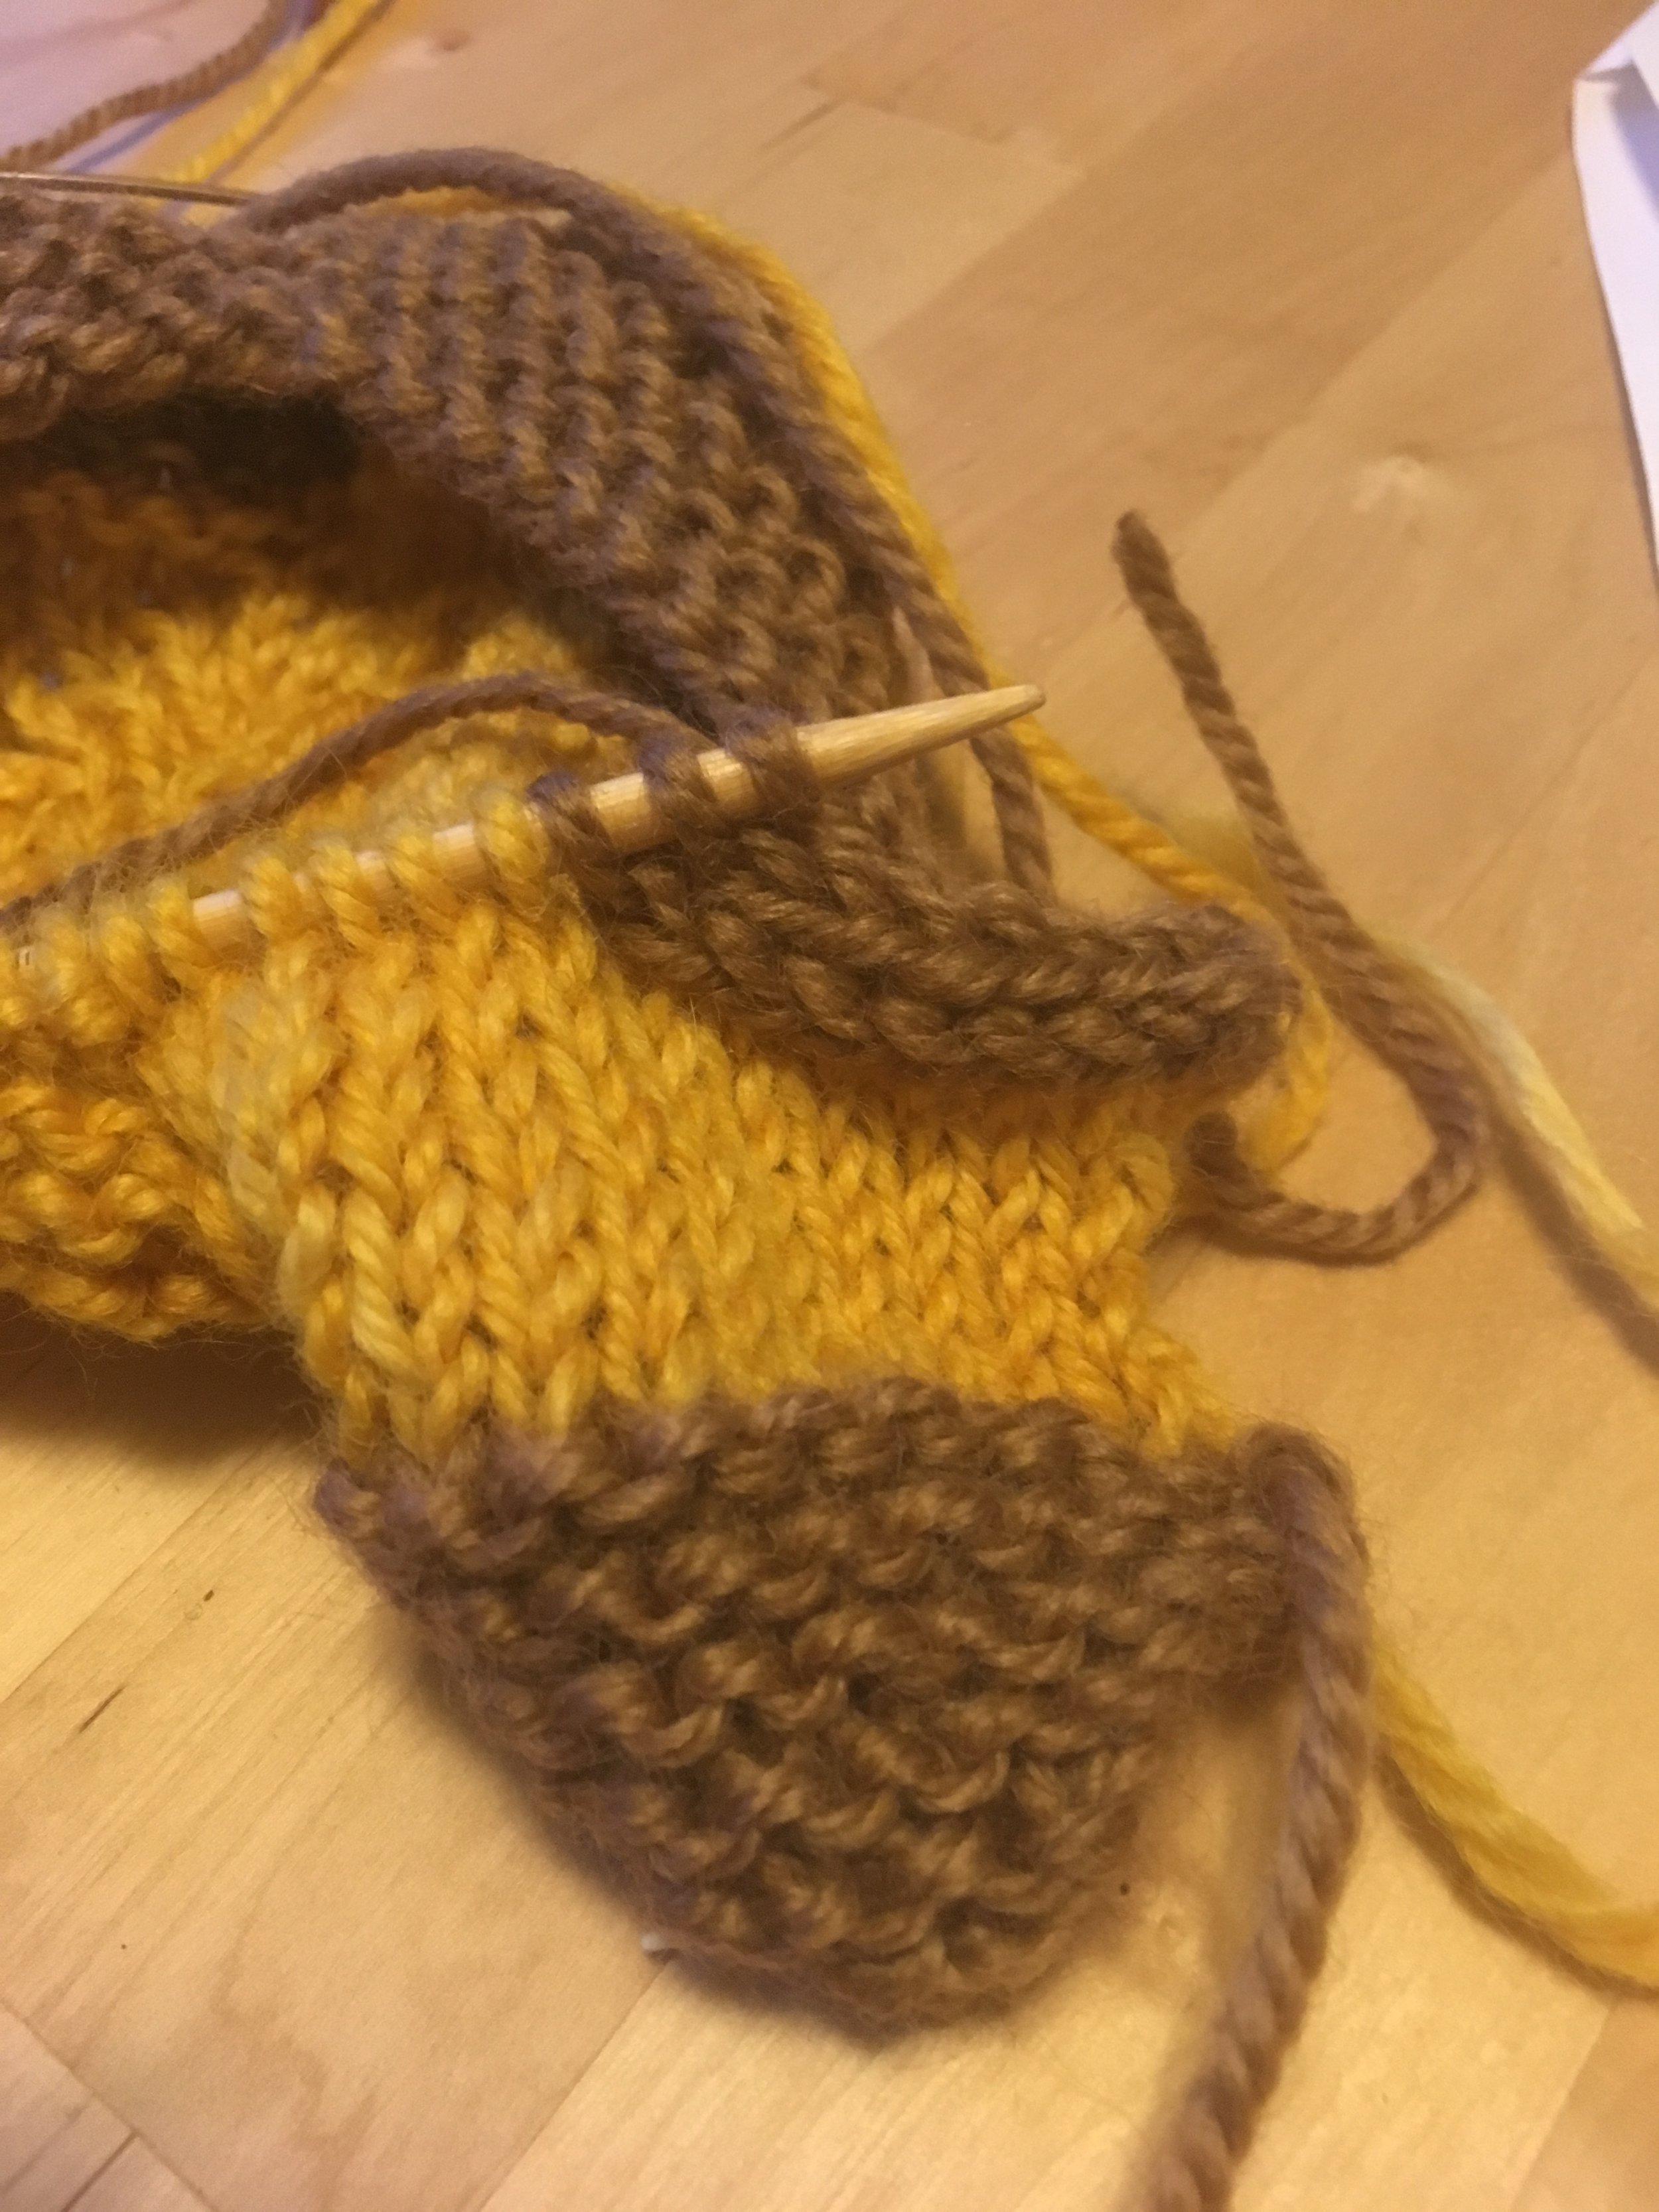
Attached I-Cord bindoff occurring here.
As indicated above, I used bulky yarn. I’ve also used chunky yarn doubled, and that worked well.
BUT WAIT, THERE’S MORE!!!
I recently discovered that gururamdas (Susie) on Ravelry, had added a calculator on the page of the original nonfelted slipper. Click here, and it will take you to a calculator that by entering gauge over 10 cm of stockinette, your foot width and your foot length, it will generate the basic numbers for doing the original nonfelted pattern for that gauge. OMG!! How cool is that! That means you could use any weight yarn. BUT, remember, if you want to knock these slippers out in an evening, you had better use bulky weight!
I have NOT yet tried the calculator, so I cannot vouch for it’s accuracy at this point, but I can’t wait to give it a try for a larger foot…but that will have to wait until AFTER the holidays. If any of you give it a go, let me know how it works in the comments. And once I’ve tried it, I’ll blog about the results.
So here’s the pattern for bulky weight, for three different sizes. If you have a bigger foot than the suggested sizes (which are given in women’s shoe sizes in pattern), you can try out the calculator and see how that works. If you use the weight yarn as written in the pattern below, it will take 29 g for the sole, 23 g for the body, and 4g for the I cord for each moccasin.
House Moccasins Pattern
Yarn: Bulky Weight, 100gr/100 yds
Needles: 16” circular US size 8
Finished Sizes: Small, (Medium, Large.)
For women’s shoe sizes 5 - 6, (7 - 8, 9 - 10.)
Gauge: Garter Stitch 4sts and 8 rows = 1”
Abbreviations:
PM - Place Marker,
SM – Slip Marker
K- Knit
P - Purl
M1R – Make One Right: Pick up the bar between the last stitch you knit and the one you’re about to knit, bringing the needle from the back to the front. Then knit into the front of this stitch.
M1L – Make One Left: Pick up the bar between the stitch you knit and the one you’re about to knit, bringing the needle from front to back. And then knit into the back of the stitch.
SSK – Slip, Slip, Knit. Slip one stitch at a time knitwise on the right hand needle, insert left needle from left to right into the front legs of the two slipped stitches on right needle, and then knit the two stitches together.
K3TOG – Knit 3 stitches together (decreasing by two stitches).
P2TOG – Purl two stitches together (decreasing one stitch).
SL1 – Slip one stitch to the right hand needle knitwise.
K2TOG - Knit 2 stitches together (decreasing one stitch).
K2TOG TBL - Knit 2 stitches together through the back loop.
PSSO –Pass the slipstitch over.
C4F - Cable 4 Front – Slip two stitches purlwise to the cable needle and hold in front of work, knit the next two stitches, then knit the two stitches on the cable needle.
T3B – Sl one stitch to cable needle and hold to back of work, knit the next two sts, then purl the stitch from cable needle.
T3F – Sl two stitches to cable needle and hold to front of work, purl the next stitch, then knit the 2 stitches from cable needle.
Note: This slipper is made flat and then sewn up the sole and back of foot.
Cable Pattern:
Row 1: P3, C4F, P3
Row 2: K3, P4, K3
Row 3: P2, T3B, T3F, P2
Row 4: K2, P2, K2, P2, K2
Row 5: P1, T3B, P2, T3F, P1
Row 6: K1, P2,K4,P2, K1
Row 7: T3B, P4, T3F
Row 8: P2, K6, P2
SOLE
Using Color 1, Cast on 46, 50, 54 using the long tail cast-on method.
Row 1 (RS): K23 (25, 27), PM, K23 (25, 27)
Row 2: K1, M1R, K21, (23, 25), M1R, K1, SM, K1, M1L, K21 (23, 25), M1L, K1 = 50, (54, 58) Stitches
Row 3: All odd rows Knit
Row 4: K1, M1R, K23 (25, 27), M1R, K1, SM, K1, M1L, K23 (25, 27), M1L K1 = 54, (58, 62) Stitches
Row 6: K1, M1R, K25 (27, 29), M1R, K1, SM, K1, M1L, K25 (27, 29), M1L, K1 = 58, (62, 66) Stitches
Row 8: K1, M1R, K27 (29, 31), M1R, K1, SM, K1, M1L, K27 (29, 31), M1L, K1, = 62, (66, 70) Stitches
Row 10: K1, M1R, K29 (31, 33), M1R, K1, SM, K1, M1L, K29 (31, 33), M1L, K1 = 66, (70, 74) Stitches
Row 12: K1, M1R, K1, M1R, K30 (32, 34), M1R, K1, (remove marker), K1,M1L, K30 (32, 34), M1L, K1, M1L, K1 = 72, (76, 80) Stitches. Cut Yarn.
SIDES AND INSTEP
Using Color 2
Row 1 (RS): Knit
Row 2: P31 (33, 35),PM, P10, PM, P31 (33, 35) = 72(76, 80) Stitches
Row 3: K24(26, 28), SSK (twice), K3TOG, SM, [work Row 1 of cable pattern], SM, Sl1, K2TOG, PSSO, K2TOG (twice), K24 (26, 28) = 64(68, 72) Stitches
Row 4: P27 (29, 31),SM, [work Row 2 of cable pattern], SM, P27 (29, 31)
Row 5: K20 (22, 24), SSK (twice), K3TOG, SM, [work Row 3 of cable pattern], SM, Sl1, K2TOG, PSSO, K2Tog (twice), K20 (22, 24) = 56, (60, 64) Stitches
Row 6: P23 (25, 27), SM, [work Row 4 of cable pattern], SM, P23, (25, 27)
Row 7: K23 (25,27), SM, [work Row 5 of cable pattern], SM, SSK, Turn Work = 55, (59, 63) Stitches
Row 8: Sl1, SM, [work Row 6 of cable pattern], SM, P2TOG, Turn Work = 54, (58, 62) Stitches
Row 9: SL1, SM, [work Row 7 of cable pattern], SM, SSK, Turn Work = 53, (57, 61) Stitches
Row 10: Sl1, SM, [work Row 8 of cable pattern], SM, P2TOG, Turn Work = 52, (56, 60) Stitches
Rows 11-26: Work Rows 1-8 of cable pattern, for two additional cable pattern repeats.
Odd rows: SL1, SM, [work next row of cable pattern], ,SM, SSK, Turn Work.
Even rows: SL1, SM, [work next row of cable pattern], SM, P2TOG, Turn Work.
End on Row 8 of cable pattern.
Row 27: Sl1, SM, P10, SM, SSK, Turn work.
Row 28: Sl1, SM, K10, SM, P2TOG, Turn work.
Row 29: Sl1, SM, P10, SM, SSK, knit to end.
Row 30: Purl to marker, remove marker, K10, remove marker, P2TOG, purl to end. 32 (36, 40) sts.
CUFF
With Color 1, join yarn and complete an attached I-Cord Bind Off.
I-Cord Bind-Off Instructions:
Step 1: With RS facing you, using Color 1, cast on three stitches to the left needle.
Step 2: K2, K2TOG TBL (3 stitches on right needle).
Step 3: Slip 3 stitches purlwise back to the left needle.
Repeat steps 2 & 3 until the last 3 stitches on the right needle.
Cut yarn, leaving a long tail, and thread the tail through the live stitches to secure them.
FINISHING
With a tapestry needle, weave in all yarn ends. Seam up the back of the foot and bottom of the sole. Wear & enjoy!

Image by Virginia Barrows